.png)
The Art of Creating Beautiful Lash Extensions: A Step-by-Step Guide
- Fearless Esti

- Sep 13, 2023
- 4 min read
Updated: Aug 5, 2024
Are you dreaming of long, luscious, and beautiful lashes that frame your eyes perfectly? Look no further! In this comprehensive guide, we will take you through the art of creating stunning lash extensions. Whether you're a professional lash artist or a DIY enthusiast, these tips and techniques will help you achieve the beautiful lashes you've always desired.
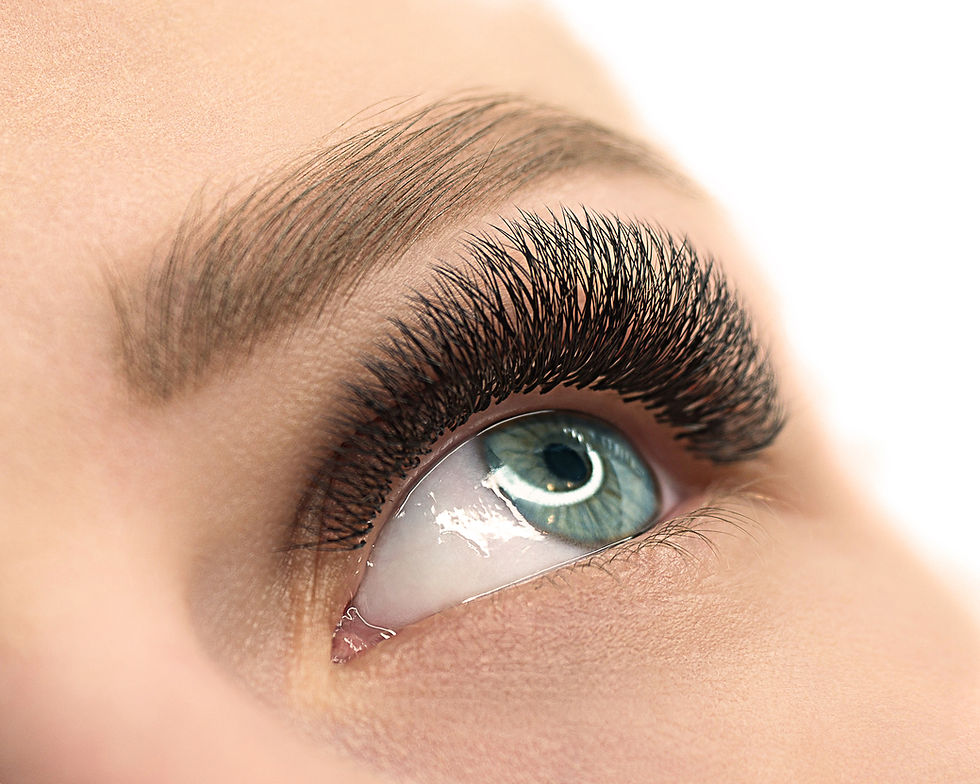
Beautiful lashes can completely transform your look, making your eyes appear bigger, more alluring, and full of life. Lash extensions have become a go-to beauty treatment for those seeking to enhance their natural beauty. In this guide, we'll not only explore the step-by-step process of creating beautiful lash extensions but also share insider tips and tricks to ensure your lashes look nothing short of stunning. If you're looking to take your lash skills to the next level, consider enrolling in our comprehensive online lash training course.
Why Beautiful Lashes Matter
Before we dive into the details of lash extension application, it's important to understand why beautiful lashes matter:
Enhanced Beauty: Beautiful lashes draw attention to your eyes, making them the focal point of your face.You'll get more attention than you ever got before!
Time-Saving: Lash extensions eliminate the need for daily mascara application, saving you precious time in your morning routine.
Boosted Confidence: Having beautiful lashes can boost your self-confidence, making you feel more attractive and put-together.
Versatility: Whether you prefer a natural look or glamorous drama, lash extensions can be customized to suit your style.
If you're serious about becoming a lash extension expert and creating consistently beautiful lashes, our online lash training course is the ideal place to start.
Step 1: Preparation
Before you start applying lash extensions, it's crucial to prepare both your workspace and your client (if you're a professional lash artist):
Ensure your tools and products are clean and organized.
Have different lash extension lengths and curls ready to create a customized look.
Explain the process to your client, addressing any concerns or questions.
For a more comprehensive understanding of preparation techniques, consider enrolling in our online lash training course.
Step 2: Isolation
Proper isolation of the natural lashes is essential to avoid clumping and ensure each extension has room to adhere. Use medical-grade tape to isolate the lower lashes and separate the upper lashes. Our online lash training course provides detailed isolation techniques to help you achieve beautiful lashes.
Step 3: Adhesive Application
Choose a high-quality lash adhesive that is safe for use on the eyes. Apply a small amount to the extension and carefully attach it to a natural lash, leaving a small gap from the lash line to prevent irritation. In our online lash training course, we delve into adhesive selection, application, room temperature and humidity settings for achieving beautiful lashes with precision and incredible retention.
Step 4: Placement
Begin placing extensions on the outer corner of the eye, working inwards. The longest extensions should be placed on the outer lashes, gradually decreasing in length towards the inner corner. This technique creates a natural, beautiful lash line. To master the art of placement, our Advanced Eyelash Styling course goes into detail on eyelash styling and provides step-by-step guidance.
Step 5: Filling in the Gaps
Continue adding extensions until you achieve the desired thickness and length. Pay attention to any gaps and fill them in as needed, making sure the lashes look full and uniform. Our online lash training course offers advanced strategies for filling in gaps seamlessly and on how to cut your lash set time in half!
Step 6: Check for Comfort
Throughout the application process, ensure your client remains comfortable. Ask them if they experience any discomfort or irritation and make necessary adjustments. Our online lash training course emphasizes client comfort and safety.
Step 7: Final Inspection
After all the extensions are in place, perform a final inspection. Make sure there are no crossed or tangled lashes, and everything looks symmetrical and beautiful.
Aftercare for Beautiful Lashes
Creating beautiful lash extensions is just the first step. To maintain their beauty, here are some aftercare tips:
Avoid Water and Steam: For the first 24-48 hours, avoid water, steam, or saunas to allow the adhesive to fully cure.
Use Oil-Free Cleansers: Use a gentle, oil-free cleanser to clean the lashes. Avoid rubbing or pulling on them.
Brush Regularly: Encourage your clients to brush their lashes daily to prevent tangling and maintain their shape.
Regular Fills: Lash extensions have a natural shedding cycle. Suggest regular fill appointments to keep the lashes looking beautiful.

For a comprehensive guide on aftercare and maintenance, explore our online lash training course.
Embrace Your Beautiful Lashes
In conclusion, beautiful lashes are not just a dream; they can be a reality with the art of lash extensions. Whether you're an experienced lash artist or a newbie, following these steps and aftercare tips will help you achieve beautiful lashes that enhance your natural beauty. If you're serious about mastering the art of creating consistently beautiful lashes, don't forget to check out our online lash training course.
Remember, the key to beautiful lashes lies in precision, proper technique, and high-quality products. Whether you're a lash artist or someone looking to enhance their beauty routine, beautiful lashes are within reach. So, embrace your beautiful lashes and let your eyes captivate the world!


Comments